Accessibility Checkers and Exporting
Please use readable PDF's as much as possible or Microsoft Word documents as both have accessibility checkers Readable PDFs ensure documents are accessible.
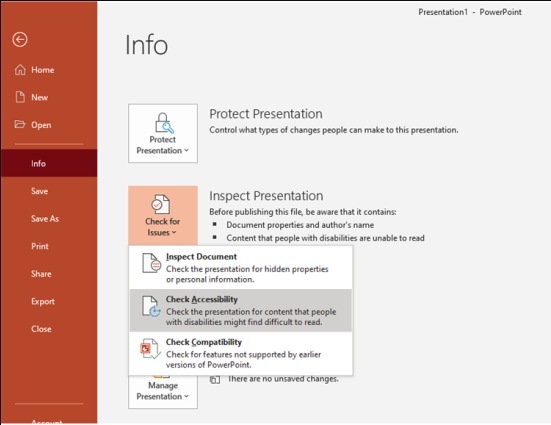
Accessibility Checker
To check accessibility in Microsoft Word or PowerPoint:
- On the left side, select 'File' then 'Info'
- Select 'Inspect Document' then 'Check for Issues'
-
Select 'Check Accessibility'
Export
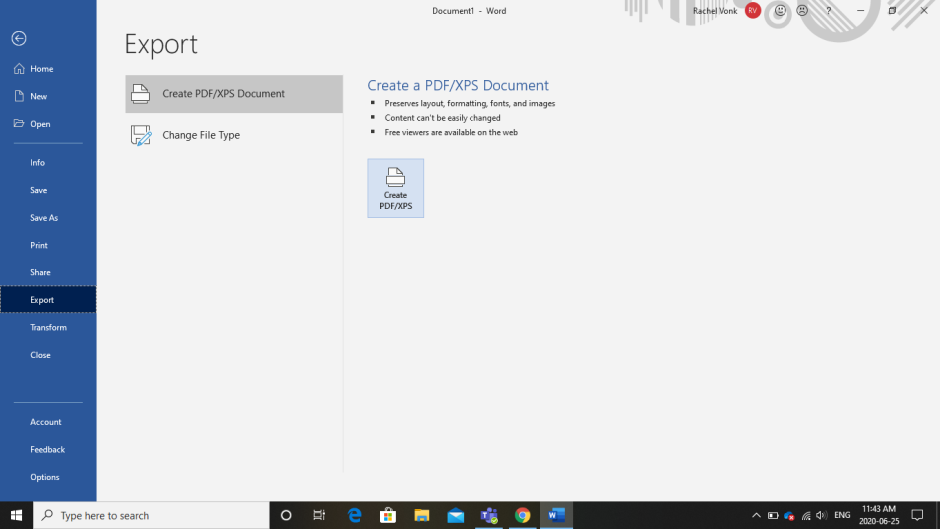
When converting a Word document to a PDF, use the "export" option on the file tab. Upon conversion, the PDF will be easily read by screen readers and searchable for assistive technologies.
- To convert a Microsoft document to PDF, use the 'Export' feature found in the 'File' tab
-
This transfers the style settings to the PDF copy
Alternative Text Moodle
-
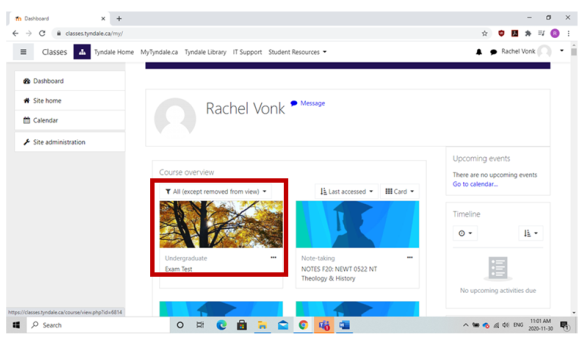
From the main Dashboard page, select the desired course
-
On the top left corner (teal coloured button), enable "Turn Edit On"

-
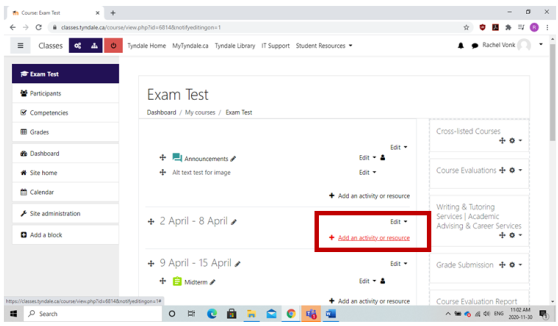
Select the week content is being added to
-
Select "Add an activity or resource"
-
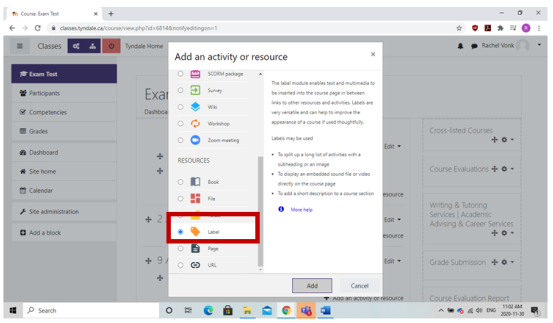
Near the tag icon, select "Label"
-
At the bottom of the pop-up menu, select "Add"
-
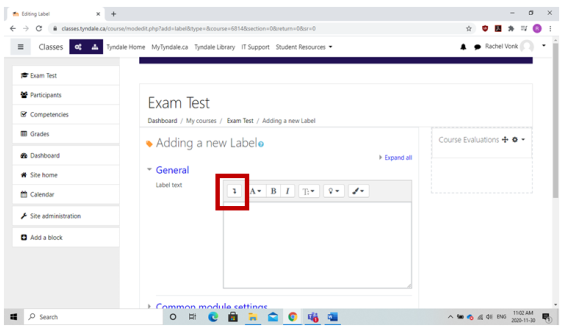
Select the first button (an Inverted L shaped arrow pointing towards the bottom the the screen)
-
After selecting, a drop down menu will open
-
Upload the respective image
-
Highlighted in red – insert alternative text in the designated area

Closed Captions
All video content posted online must be accompanied by closed captions (AODA compliance) by January 2021.
Microsoft Office
- Read more in-depth resources on creating closed captions for a video
- Read more information on how to upload closed captions to a Microsoft PowerPoint
Microsoft Teams
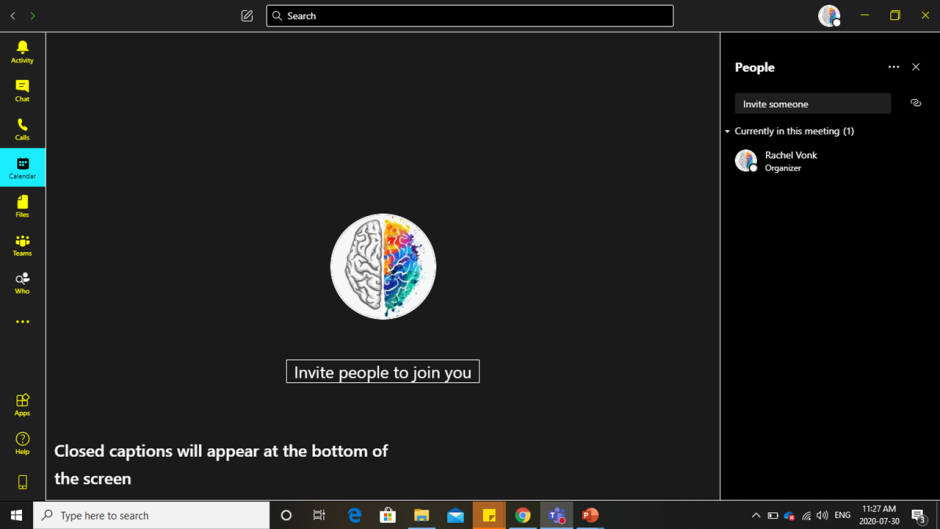
Microsoft Teams now provides real-time closed captions during video calls.
-
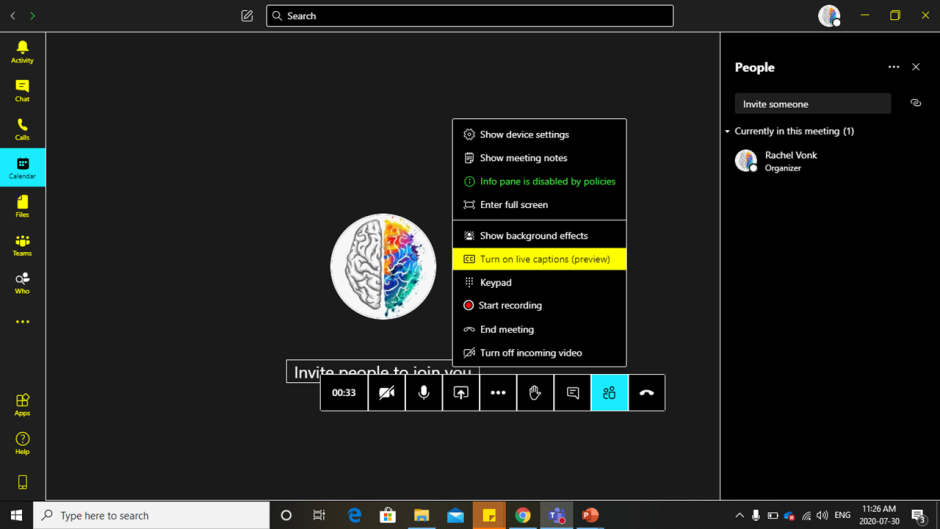
To turn on live closed captions first select "More Actions" (three dots)

-
Select "Turn on live captions (preview)" to turn on closed captions.
-
Closed captions will appear at the bottom of the call screen
Colour and Images
- Stick to simple colours in documents like black and white, or use the Tyndale colours.
- Select images that are recognizable and that have strong colour contrasts.
- Ensure all images have alternative text (click on the image, open the 'Picture Format' tab and select 'Alt text').
Columns, Tables & Textboxes
Insert Columns
- Select 'Layout' tab
- Select 'Columns'
Insert Tables
- Select 'Insert' tab
- Select 'Table' (custom or premade)
- Use the table heading and row header features found in the 'Table Design' tab, especially for tables longer than one page
Textboxes
- Add alternative text if you must use a textbox.
- Avoid textboxes as much as possible.
Font, Styling and Spacing
- No smaller than 12 ppt
- Use 'sans serif' fonts only. Tyndale's in-house sans serif font is Calibri.
- Keep headings consistent by using the Style settings (located in the Home tab).
- Do not manually insert page numbers. Use the page number feature found in the 'insert' tab.
- To start a new page, select the 'insert' tab and ' Page Break'.
- Avoid manually adjusting spacing in documents. Use the 'Paragraph Formatting' menu found in the 'Home' tab.
Graphs and Charts
- Always include a brief description below a graph/chart summarizing the information provided in the graph/chart.
- Use simple charts and graphs with clear colour contrast and font no smaller than 12ppt.
- Include a clear, enlarged image of any text smaller than 12ppt (ex: graph legend).
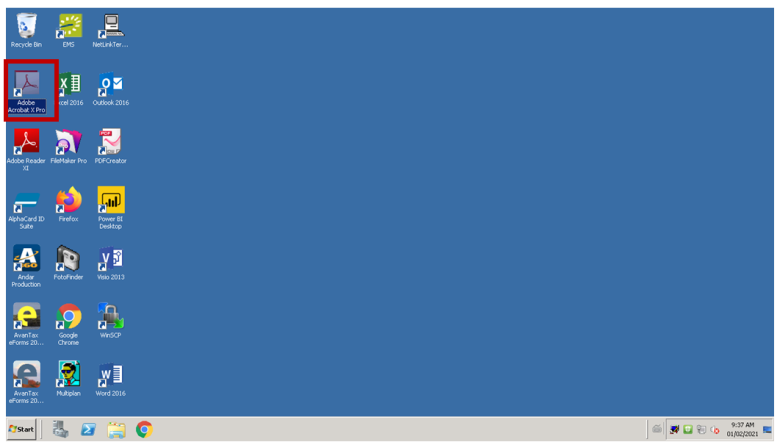
Portable Document Format (PDF) Conversion
-
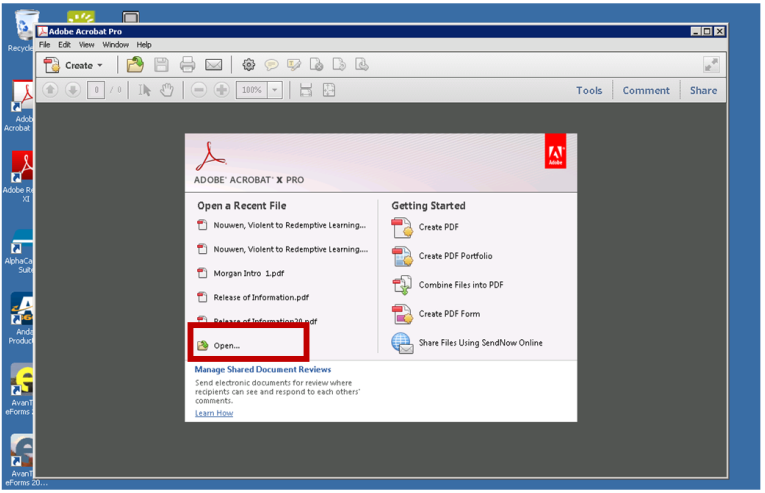
Open Adobe Acrobat Pro through the VPN.
-
Click ‘Open’ and select the file you wish to convert.
-
This will open the PDF in Adobe.
-
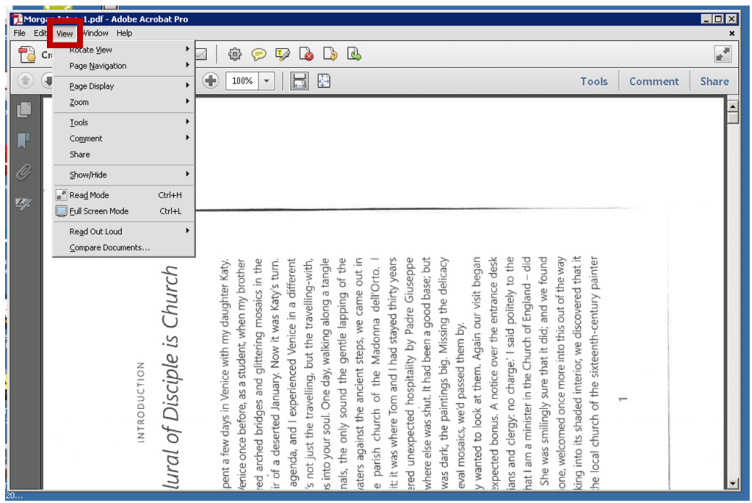
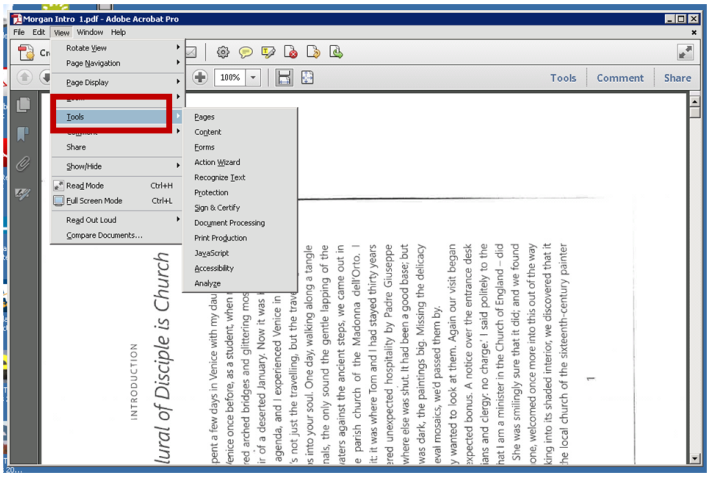
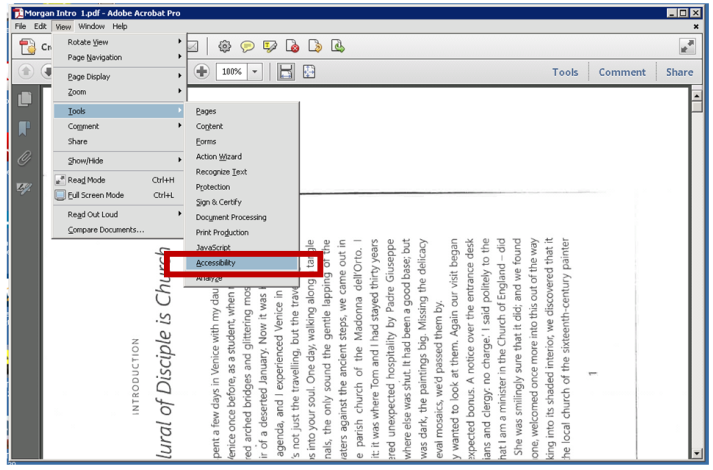
Select 'View'.
-
Select 'Tools'.
-
Select 'Accessibility'.
-
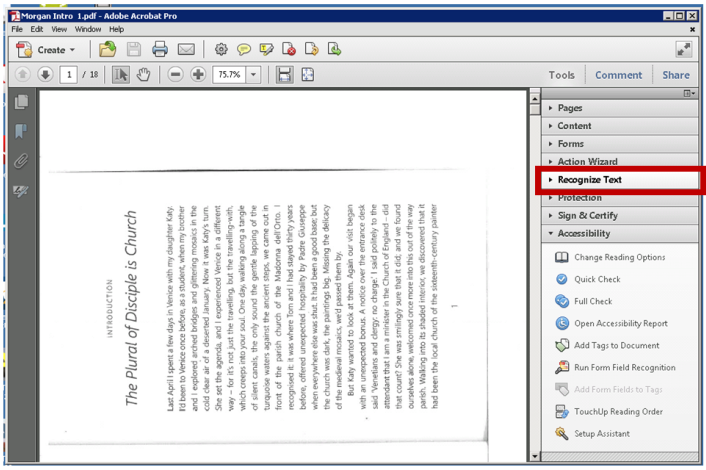
On the right side of the screen, a drop down menu will appear.
-
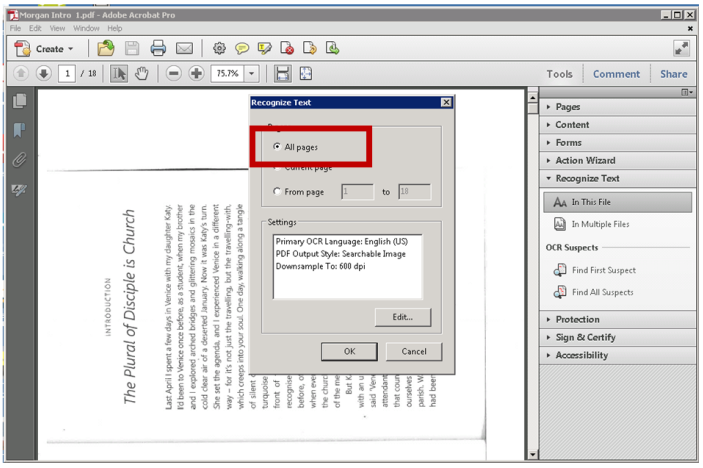
Select ‘Recognize Text’.
-
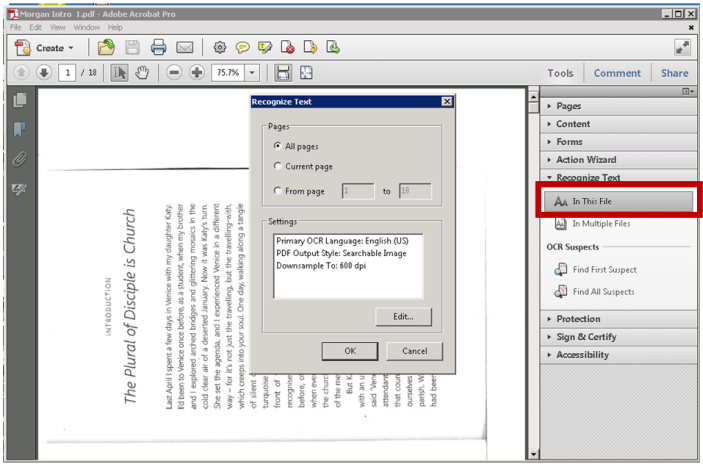
Select ‘In This File’ from the drop-down menu.
-
Select ‘All Pages’ then select ‘Ok’.
- The document will take a few moments to OCR scan the document.
-
Save the document adding ‘Accessible’ to the file name.
PowerPoint Presentation
Presentation Format
- Speak in an even tone at a moderate pace while presenting.
- Provide a brief verbal description of any images displayed on a slide.
- If you are filming a presentation, face the camera to allow for lip and facial expression reading.
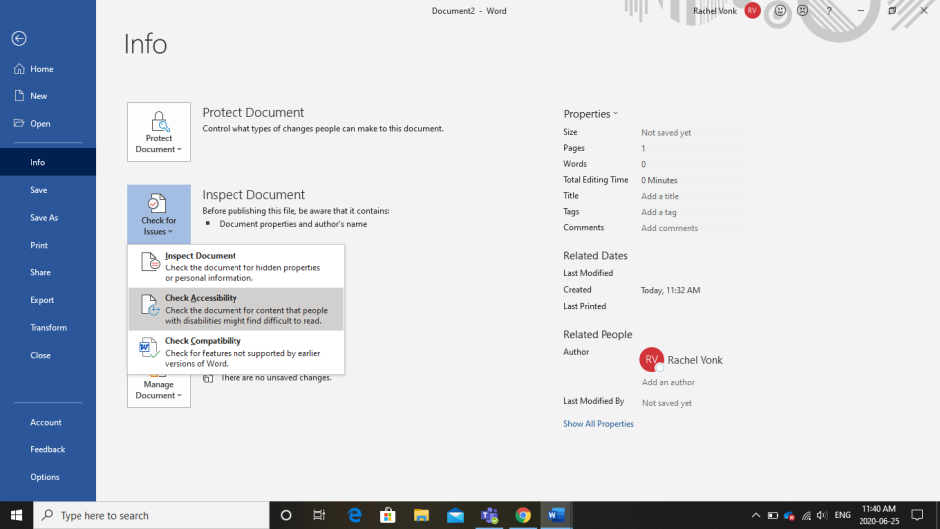
Check Accessibility
- To check accessibility in PowerPoint, go to 'File' and select 'Info'
- Select 'Inspect Document', then select 'Check for Issues'
-
Select 'Check Accessibility'