The Centre for Academic Excellence mostly uses Microsoft Teams to conduct appointments. Here's what you can expect in a Teams appointment with us.
Troubleshooting Teams
If you're new to Teams, keep reading below. But if you're having trouble logging in or your call doesn't seem to connect, check out this handy guide from our IT Department.
Using Microsoft Teams
There are two ways to access Teams:
1. Download the Application: Download Teams directly to your computer or phone/tablet from the Microsoft Teams website. HINT: Download the correct version - Desktop for Windows/Mac (preferred) or Mobile for phones or tablets.

2. Online Browser - Teams can also be accessed online. We recommend using Google Chrome or Microsoft Edge.
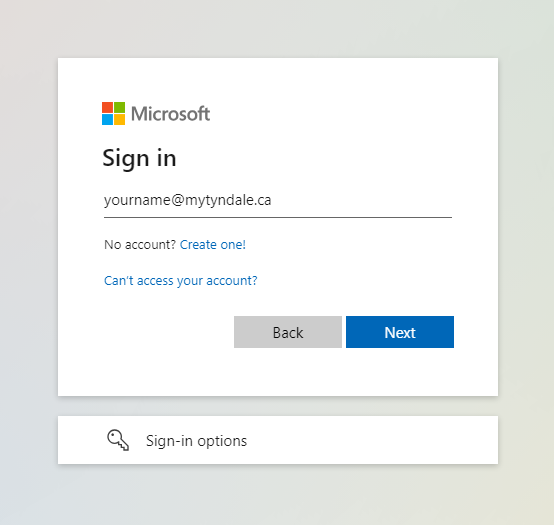
Log in using your myTyndale username and password. (If you are logged in with a different account, log out and close your app/browser before trying to log in again.)
Your Appointment
- Click the "Chat" button on the left side of your Teams dashboard. It has a "speech bubble" icon.
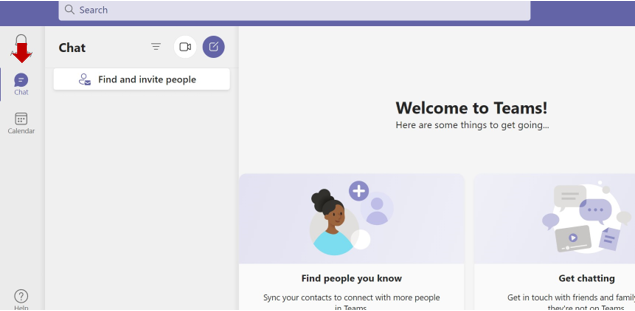
- Wait for your Consultant to message you. Respond to let them know you are ready.

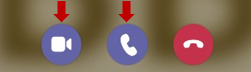
- Your Consultant will call you after they receive your reply. A pop-up window will appear with their name. Click the "Video Cameera" icon (or, if you don't have a webcam, the "telephone" icon).
Sharing Documents on Teams
HINT: You can send documents ahead of your appointment to the appropriate email address. For Writing/Tutoring appointments, you can also attach your document to your appointment booking on WC Online.
- Select the attachment icon (the paperclip) in the chat box.

- Select "Upload from my computer" and choose your file.

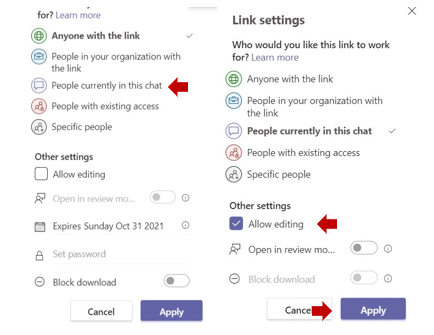
- Allow permission to edit. Before sending the document, click the little dropdown below the filename that says, "Anyone with the link can view."

- Change the edit settings. Click the "People currently in this chat" and the "Allow editing" buttons. Then click "Apply" to confirm the changes. If done correctly, the dropdown should now read, "People currently in this chat with the link can edit."
- Send your document by clicking the "Enter" key or the little paper airplane button.
